
Creating a DIY 3D relief mural is an exciting way to add depth, texture, and artistic character to a plain wall. However, choosing the right materials is essential for achieving a clean and durable result. Therefore, beginners should select products that are easy to mix, shape, layer, and paint.
For example, joint compound works well for soft raised patterns, while Plaster of Paris can create sharper sculptural details. Similarly, modeling paste is useful for smaller artistic projects. Before starting your DIY 3D relief mural, test each material on a small board. This simple step can help prevent cracking, poor adhesion, and unwanted texture.
1. Joint Compound for Soft Relief
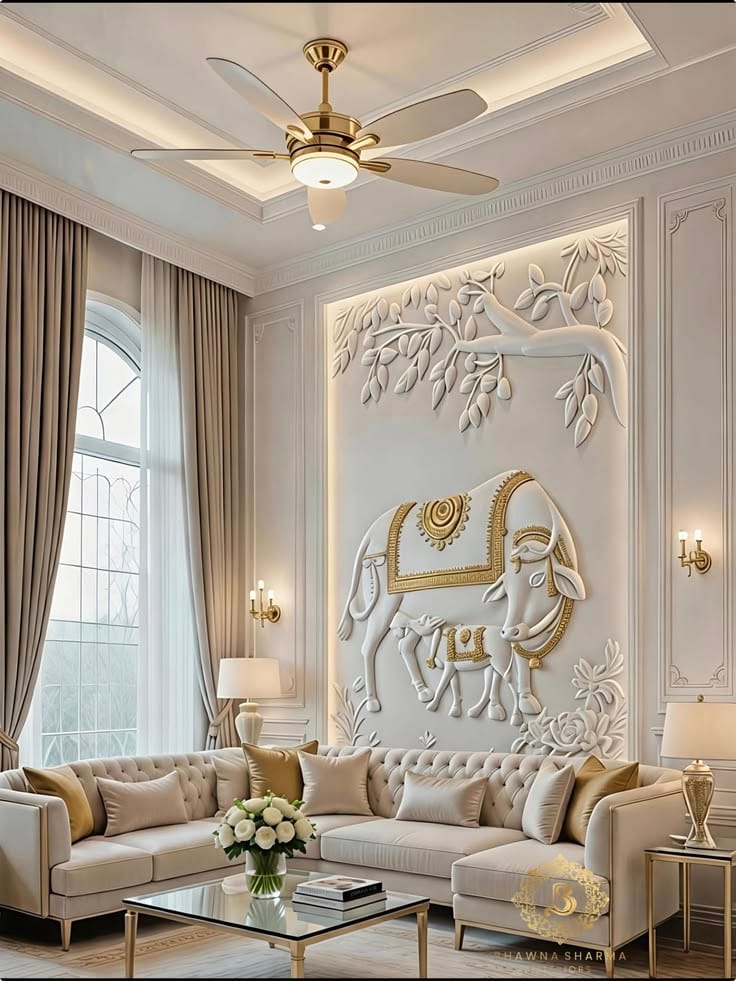
Joint compound is one of the most beginner-friendly choices for a DIY 3D relief mural. It spreads easily with a putty knife and gives you enough working time to create curves, waves, leaves, arches, and abstract patterns. For more details visit to our page.
Moreover, it can be layered carefully to build dimension. Premixed joint compounds are also available, which reduces preparation time.
For this reason, joint compound is particularly suitable for organic and minimalist relief designs.
2. Plaster of Paris for Fine Details
Plaster of Paris is another useful option, especially when you want sharper edges and sculptural details. It sets faster than joint compound, so you need to work efficiently.
However, beginners should avoid applying very thick layers at once. Instead, build the relief gradually and allow each layer to dry properly. This approach can help reduce cracking.
3. Modeling Paste for Artistic Texture
Modeling paste is designed specifically for textured artwork. Therefore, it can be a convenient choice for smaller murals, panels, and decorative wall sections.
It works particularly well with palette knives and can support raised lines, waves, geometric patterns, and abstract forms. For a small experimental project, it may be easier to control than traditional plaster.
4. Fiberglass Mesh for Added Support
For larger wall reliefs, fiberglass mesh can provide additional reinforcement in areas that require support. Mesh is commonly used with compound and plaster systems to strengthen surfaces and manage cracks around vulnerable areas.
Nevertheless, mesh should be used according to the material manufacturer’s instructions. A professional should handle complex structural applications.
5. Primer for Better Adhesion
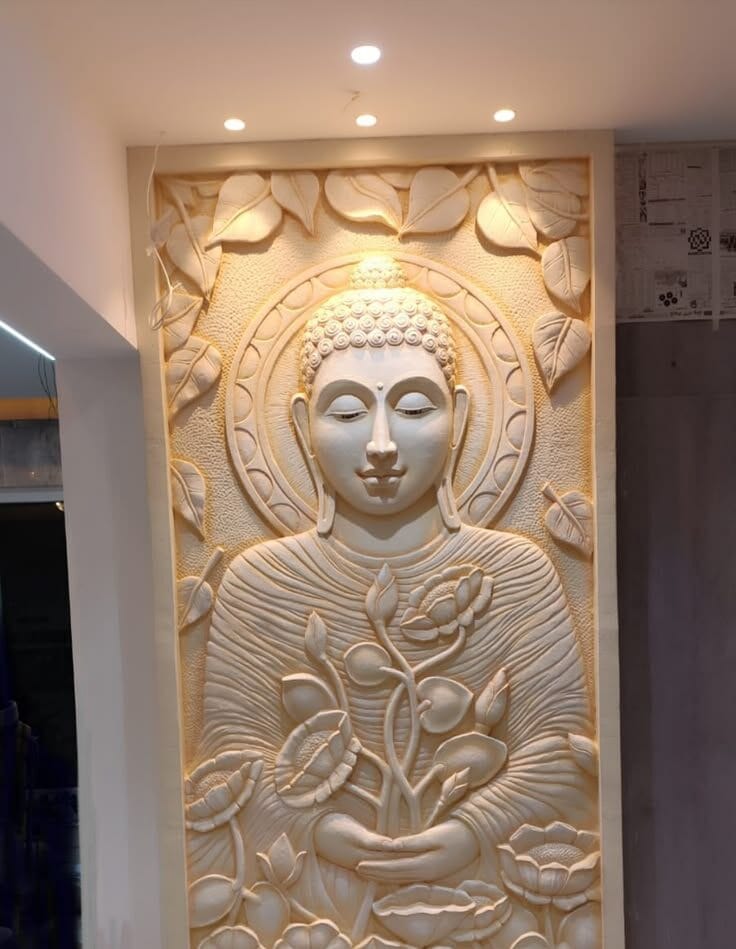
Primer is an important part of surface preparation. First, clean the wall and remove loose paint or dust. Next, allow the surface to dry completely. Then apply a compatible primer before building the relief.
A properly prepared surface gives the material a better base. As a result, peeling and adhesion problems can be reduced.
6. Acrylic Paint for Colour
Once the relief has dried completely, acrylic paint can be used to introduce colour and contrast. You can choose a single shade for a minimalist appearance or combine several tones to highlight the raised areas.
Furthermore, lighter paint on raised edges can make shadows appear stronger, while darker tones can visually deepen recessed areas.
7. Essential Tools for a DIY 3D Relief Mural
You do not need an expensive professional toolkit. Instead, start with:
- Putty knives
- Palette knives
- Small trowels
- Notched combs
- Fine brushes
- Painter’s tape
- Sandpaper
- Mixing containers
- Drop cloths
- Protective gloves
Interestingly, simple household objects such as forks, combs, and cardboard can also create distinctive textures.
8. Matte Sealer for the Final Finish
After painting, a suitable matte sealer can help protect the finished surface. However, make sure the relief is completely dry before sealing it.
Acrylic-based sealers are commonly used for textured artwork because they can reduce surface dust and provide a protective layer.
Which Material Should Beginners Choose?
For most beginners, joint compound is a practical starting point because it is easy to spread and shape. However, Plaster of Paris is better when crisp sculptural details are required, while modeling paste suits smaller artistic projects.
Therefore, your choice should depend on the design, surface, relief thickness, and expected finish.
For additional inspiration, explore related resources such as DIY Textured Canvas Art, DIY Textured Plaster Art, Plaster Wall Art, and How to Make 3D Wall Painting Art. These pages offer useful ideas for texture, tools, layering, and finishing techniques.
Helpful Websites for Further Reading
- Fine Homebuilding – Make Old Walls Smooth and Sound
- The Home Depot – Drywall Finishing Guide
- Jenna Sue Design – DIY Textured Canvas Art
Frequently Asked Questions
Can beginners make a 3D relief mural?
Yes. Beginners can start with a small board or limited wall section. However, large architectural reliefs require greater material and surface knowledge.
Is joint compound good for a DIY 3D relief mural?
Yes. Joint compound is suitable for many beginner-friendly raised textures because it is easy to spread and shape.
Can Plaster of Paris be used on a wall?
It can be used for suitable decorative applications, but surface preparation and application thickness matter. For large or permanent wall installations, professional guidance is recommended.
How thick should a relief layer be?
There is no universal thickness because the suitable depth depends on the material and surface. As a beginner, build thinner layers rather than creating one very thick application.
Can I paint directly over plaster?
It is better to let the plaster dry completely and then use an appropriate sealer or primer before painting. This helps manage the material’s absorbency.
What is the easiest material for beginners?
Joint compound or artist-grade modeling paste is generally easier to control than fast-setting Plaster of Paris. Your design and wall surface should guide the final choice.
Suggested external links (official websites):
- The Spruce – https://www.thespruce.com
- This Old House – https://www.thisoldhouse.com
- Artists Network – https://www.artistsnetwork.com
- Blick Art Materials – https://www.dickblick.com
- Fine Homebuilding – https://www.finehomebuilding.com
Latest Posts
High-End Wall Decor: Artistic Ideas for Refined Modern Interiors
High-end wall decor is becoming an essential part of premium interior design. Today, walls are no longer treated as simple […]
Expensive Wall Art: What Makes Luxury Wall Décor Worth the Price
Luxury interiors are no longer defined by furniture alone. Today, expensive wall art plays an important role in creating distinctive […]
Luxury Wall Decor: Artistic Wall Designs for Refined Interiors
Luxury wall decor is no longer limited to expensive paintings or designer wallpapers. Instead, homeowners are choosing artistic surfaces that […]
Luxurious Wall Art: Sophisticated Ideas for Modern Interiors
Luxurious wall art is becoming an essential part of thoughtfully designed interiors. Today, homeowners want more than beautiful furniture and […]
Luxury Wall Murals: Bespoke Art for Sophisticated Interiors
Luxury wall murals are becoming a preferred choice for homeowners who want interiors with individuality, artistic depth, and lasting visual […]
Luxury Wall Design: Refined Textures, Artistic Murals and Modern Elegance
Luxury wall design is becoming an essential part of contemporary interiors. Rather than relying only on expensive furniture, homeowners are […]

Really glad I stumbled upon this platform. The interface is super clean and the registration process was a breeze. Highly recommend idsanur999 for anyone wanting a smooth experience.
Super addictive games and the daily rewards keep me coming back. I have told all my friends to join phjilii already!